My home made solar cell step by step
Step 1Materials you will need


A sheet of copper flashing from the hardware store
A transparent CD case
Electric wire
Sodium bicarbonate or Table salt
An electric stove
hot glue
solder
Sheet metal shears for cutting the copper sheet
I suggest you visit http://scitoys.com there are many projects and interesting kit
A transparent CD case
Electric wire
Sodium bicarbonate or Table salt
An electric stove
hot glue
solder
Sheet metal shears for cutting the copper sheet
I suggest you visit http://scitoys.com there are many projects and interesting kit
Step 2How to prepare copper

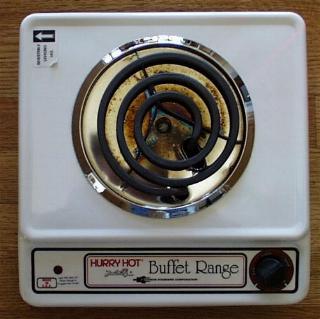
The first step is to cut a piece of the
copper sheeting that is about the size of the burner on the stove. Wash
your hands so they don't have any grease or oil on them. Then wash the
copper sheet with soap or cleanser to get any oil or grease off of it.
Use the sandpaper or wire brush to thoroughly clean the copper sheeting,
so that any sulphide or other light corrosion is removed.
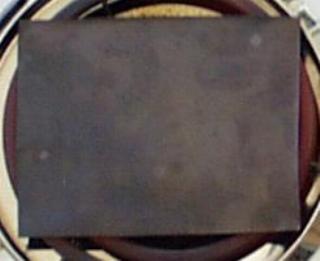
Next, place the cleaned and dried copper sheet on the burner and turn the burner to its highest setting.
Next, place the cleaned and dried copper sheet on the burner and turn the burner to its highest setting.
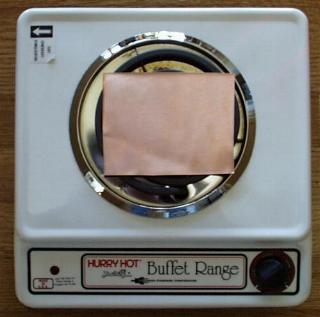
Step 3Cooking the copper

cook the copper for at least 30 min.
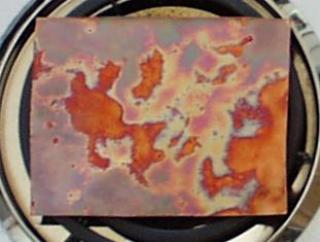
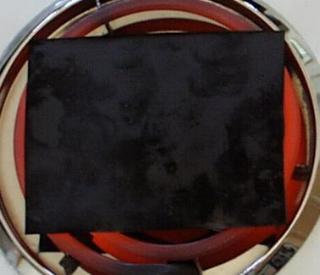
As the copper gets hotter, the colors are replaced with a black coating of cupric oxide. This is not the oxide we want, but it will flake off later, showing the reds, oranges, pinks, and purples of the cuprous oxide layer underneath.
The last bits of color disappear as the burner starts to glow red.
When the burner is glowing red-hot, the sheet of copper will be coated with a black cupric oxide coat. Let it cook for a half an hour, so the black coating will be thick. This is important, since a thick coating will flake off nicely, while a thin coat will stay stuck to the copper.
After the half hour of cooking, turn off the burner. Leave the hot copper on the burner to cool slowly. If you cool it too quickly, the black oxide will stay stuck to the copper.
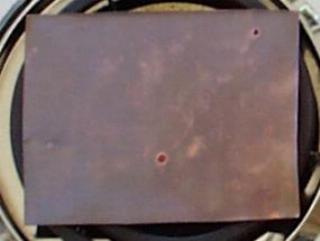
Step 4Prepare the cooked copper

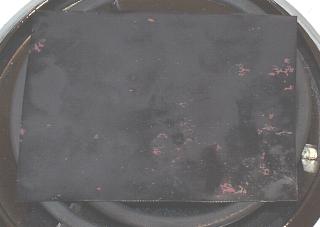
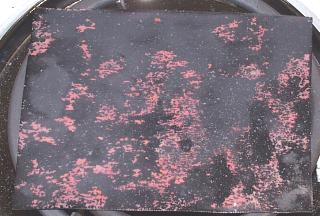
When the copper has cooled to room
temperature (this takes about 20 minutes), most of the black oxide will
be gone. A light scrubbing with your hands under running water will
remove most of the small bits. Resist the temptation to remove all of
the black spots by hard scrubbing or by flexing the soft copper. This
might damage the delicate red cuprous oxide layer we need to make to
solar cell work.
When you are finished cleaning the copper should be as in the photo
When you are finished cleaning the copper should be as in the photo
Step 5Assemble the cell


Cut another sheet of copper ,
Solder a wire to each copper plate
glue to insulate the soldering
glue the plate as in photo
Solder a wire to each copper plate
glue to insulate the soldering
glue the plate as in photo
Step 6Fill and seal the cell

seal the cell and fill it with a solution of baking soda (or cooking salt) and water
Step 7Test the cell


test the cell whit Sunlight
A note about power
my cell produces 58 microamps at 0.10 volts.
Don't expect to light light bulbs or charge batteries with this device. It can be used as a light detector or light meter, but it would take acres of them to power your house.
A note about power
my cell produces 58 microamps at 0.10 volts.
Don't expect to light light bulbs or charge batteries with this device. It can be used as a light detector or light meter, but it would take acres of them to power your house.


